Baking bread is a delightful and rewarding experience. The scent of freshly baked bread wafting through your home is enough to make anyone’s mouth water.
But what if you want to bake bread on your own schedule? That’s where storing bread dough after rising comes into play.
In this article, I’ll reveal how to store bread dough after rising in 5 easy steps and some common mistakes to avoid while storing bread dough after rising. Let’s dive in.
How to Store Bread Dough After Rising -Revealed
After the bread dough has risen, it is crucial to store it appropriately to maintain its quality and texture.
Here are 5 steps to store bread dough after rising:
1. Deflate the Dough
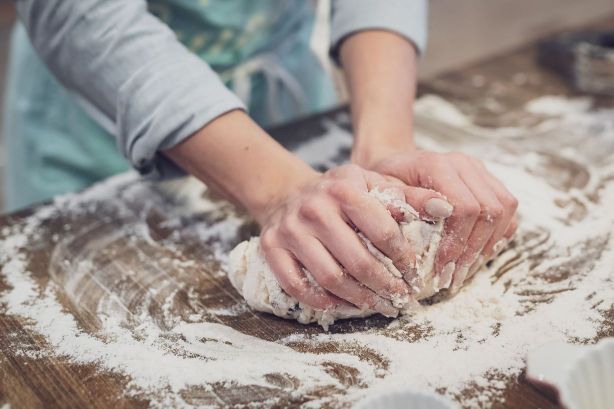
To prepare your dough for storage, begin by gently deflating it. You can do this either by softly pressing down on it with your hands or using a dough scraper.
The purpose of this step is to remove any excess gas that has built up during the dough’s rising process.
If you skip this step, the dough might continue to expand in the refrigerator, potentially leading to overproofing, which can negatively affect the texture and flavor of your baked goods.
2. Shape the Dough (Optional)
At this point, you have the option to shape the dough into its final form, such as a loaf or roll, or you can choose to store it as a simple ball of dough.

Shaping is not mandatory at this stage, so you can decide whether to do it now or just before you plan to bake.
Shaping can enhance the appearance and texture of your final product, but it’s a matter of personal preference and the recipe you’re following.
3. Wrap the Dough
To ensure your dough remains fresh, it’s crucial to place it in an airtight container or wrap it tightly in plastic wrap.
The goal here is to create a barrier that prevents air from coming into contact with the dough.
Exposure to air can cause the dough’s surface to dry out and develop a crust, which is undesirable if you want to achieve the desired texture and flavor in your baked goods.
4. Label and Date
It’s a good practice to label the container or plastic wrap with the date you’re storing the dough.
This simple step helps you keep track of how long the dough has been in the refrigerator, which is essential for ensuring its freshness.
Different types of dough have varying shelf lives in the fridge, so having a clear date marker will help you determine when it’s time to use or discard the dough.
5. Refrigerate the Dough
Finally, place the wrapped or containerized dough in the refrigerator. The lower temperature inside the fridge will slow down the activity of the yeast in the dough.
This slow fermentation process is beneficial as it allows the dough to develop more complex flavors over time.
Typically, you can store dough in the refrigerator for anywhere from 24 to 48 hours, depending on the recipe’s recommendations and your baking schedule.
6 Common Mistakes To Avoid While Storing Bread Dough After Rising
Here are 6 common mistakes most people make while storing bread dough after rising:
1. Improper Sealing
When storing risen dough, make sure it’s well-sealed to prevent the dough from drying out or developing a crust.
Use airtight containers, plastic wrap, or a damp kitchen towel to cover the dough securely.
2. Excess Flour During Shaping
When you’re in the process of shaping your dough into loaves or rolls before the final rise, it’s essential to strike the right balance with flour.

Excessive flour can have a negative impact on your bread’s texture, making it dry and crumbly.
Instead, lightly dust your hands and work surface with flour, ensuring that you don’t overdo it. This way, your dough will maintain its desired moisture content.
3. Inadequate Temperature Control
The temperature at which you allow your dough to undergo its final rise plays a critical role in the outcome of your bread.
Aim for a draft-free, slightly warm environment, typically between 75-80°F (24-27°C).
Avoid extreme temperatures, whether too hot or too cold, as they can interfere with the yeast’s activity.
4. Skipping the Final Rise
Some bread recipes call for a second rise after the initial shaping of the dough. Skipping this step can result in a denser loaf with less developed flavor.
It might require some patience, but allowing the dough to rise again as instructed in the recipe is essential for achieving the desired texture and taste.
5. Ignoring Dough Hydration
Different bread recipes specify various hydration levels, which significantly impact the texture of the dough.
Always follow the recipe’s instructions regarding the correct hydration level.
Adding too little or too much liquid can lead to undesirable results, affecting the dough’s consistency and the final bread’s quality.
6. Use of Old Yeast
Your choice of yeast is pivotal in the bread-making process. Always check the expiration date on your yeast packaging.
Expired yeast may fail to activate properly, resulting in inadequate rising and flavor development.
To extend yeast shelf life, store it in a cool, dry place or, for longer preservation, keep it in the refrigerator.
Ensuring the yeast’s viability is a fundamental step for successful bread baking.
How to Store Bread Dough After Rising – Conclusion
In conclusion, storing bread dough after rising is a valuable skill for any home baker.
It allows you to enjoy freshly baked bread at your convenience. Whether you choose the refrigerator or freezer method, proper storage ensures your dough remains in top shape until you’re ready to bake.
So go ahead, experiment with different recipes, and savor the joy of homemade bread anytime you desire.
Frequently Asked Questions
Can I Let the Dough Rise Overnight on the Counter?
Yes, you can let the dough rise overnight on the counter, but with some precautions.
It’s crucial to consider room temperature, if it’s too warm, the dough can overproof, leading to a sour taste or collapsed texture.
Ideally, maintain a cooler room temperature (around 55-65°F or 13-18°C) for an extended rise. Cover the dough with plastic wrap or a damp cloth to prevent drying.
Can I Refrigerate Bread Dough After the First Rise?
Yes, you can refrigerate bread dough after the first rise, a technique known as retarding the dough.
After the initial rise, punch down the dough, shape it into a ball or desired form, and place it in an airtight container or tightly wrapped in plastic.
Refrigerating the dough slows down yeast activity, enhancing flavor development and making it more convenient for timing your baking. It can be stored in the refrigerator for up to 24 hours.
Can I Refrigerate Bread Dough After the Second Rise?
Yes, you can refrigerate bread dough after the second rise, but it’s best to shape the dough into its final form before refrigeration.
Once your bread dough has undergone both rises, shape it into loaves or rolls as desired, then cover it well with plastic wrap or a damp cloth. Refrigerating at this stage is convenient if you want to delay baking.

