If you’ve ever tried to make bread or pizza dough, you know how important it is for the dough to be stretchy. However, sometimes the dough just won’t cooperate, leaving you with a frustrating mess.
Several factors can impact the elasticity of dough, leaving you with a non-stretchy dough that can be challenging to shape and roll.
In this article, we’ll explore the 4 reasons why your bread dough is not stretchy and provide some troubleshooting tips to help you achieve the perfect elasticity.
So, if you’ve been wondering, why is my bread dough not stretchy? keep reading to find out.
Why Is My Bread Dough Not Stretchy – Revealed
Dough elasticity is one of the key factors in creating delicious bread. If the dough is too firm or too soft, it can result in a dense, dry loaf, or a gummy, heavy one.
It’s important to understand why your dough isn’t stretchy so you can make adjustments to get the desired texture.
Here are the 4 reasons for non-stretchy dough and a detailed explanation of how each factor can affect dough elasticity:
1. Type of Flour
The type of flour used in making dough can have a significant impact on the dough’s elasticity. This is due to the protein content of different flour varieties, which determines how much gluten is formed when the dough is mixed.
Gluten is a network of proteins that trap gas bubbles, creating a stretchy and elastic dough.
Different types of flour contain varying amounts of protein, which affects gluten formation. Bread flour, for instance, has a higher protein content than all-purpose flour, resulting in a more elastic dough.
In general, high-protein flours, such as bread flour or durum wheat flour, are preferred for making bread doughs, as they create a strong gluten structure that can trap carbon dioxide produced during fermentation, resulting in a good rise and a chewy texture.
On the other hand, low-protein flours like cake flour or pastry flour are preferred for making delicate pastries like cakes, biscuits, or pie crusts, where a tender texture is desired.
These types of flour create less gluten when mixed, resulting in a crumbly and tender baked good.
2. Hydration Levels
when it comes to making dough. It might seem like a small detail, but trust me, it can make a world of difference.
Here’s the scoop: when you’re adding water to your dough mixture, the amount you use can seriously impact how elastic your dough ends up being.
And it all comes down to gluten, the protein that’s responsible for that stretchy, satisfying texture we all love.
The more water you add, the more gluten formation you’ll get. And when gluten forms, it traps the carbon dioxide released by yeast during fermentation, which creates those oh-so-important air pockets that make your dough rise.
The result? A more elastic dough that’s light, fluffy, and just plain delightful.
But be warned; too much water can actually have the opposite effect. When there’s too much liquid in the mix, the gluten gets oversaturated and can’t hold its structure.
That leads to a sticky, messy dough that’s a pain to work with. So, to get that perfect balance of elasticity and workability, it’s key to measure your water carefully. That way, you can achieve the dough of your dreams and whip up some seriously delicious baked goods.
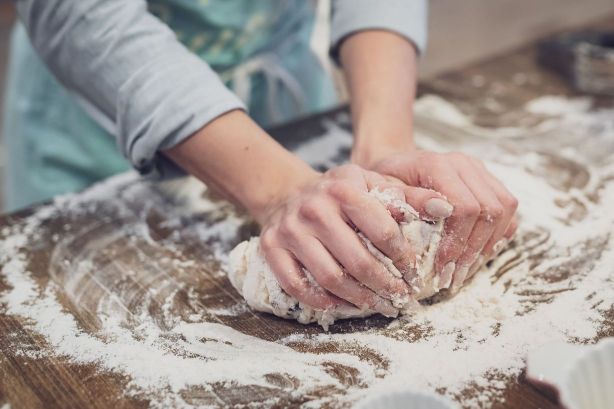
3. Mixing Technique
The technique used to mix the dough can have a significant impact on its elasticity. One common technique for achieving a more elastic dough is kneading it for a longer period of time.
Kneading helps activate the gluten in the flour, which gives the dough its stretchy and elastic texture. However, it’s essential to be cautious not to over-knead the dough, as this can cause it to become excessively elastic and have a gummy texture.
Kneading is a critical step in bread and pastry making. It is a process of working the dough by stretching, folding, and pressing it repeatedly to develop gluten.
Gluten is a protein present in wheat flour that forms an elastic network, which traps air bubbles during fermentation and gives baked goods their structure and texture.
When you knead the dough, you activate the gluten strands, which help hold the dough together and form a strong, cohesive structure.
The amount of kneading required depends on the type of bread or pastry being made. Some doughs require more kneading than others to achieve the desired texture. For instance, bread dough usually requires more kneading than pastry dough.
However, excessive kneading can cause the gluten strands to become too strong, resulting in an overly elastic and chewy texture.
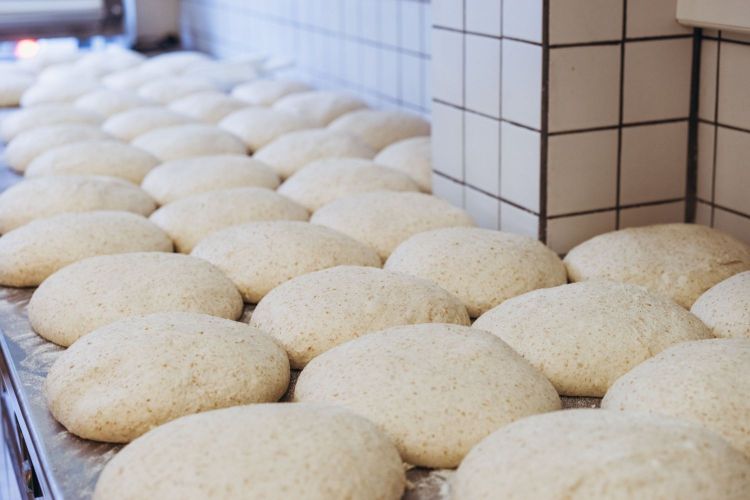
4. Rising Time
The time given for the dough to rise has a significant impact on its elasticity. When the dough is given more time to rise, it leads to more gluten formation resulting in a more elastic dough.
However, if the dough is allowed to rise for too long, it can become over-proofed, meaning that the yeast has consumed all the available sugars and produced too much carbon dioxide, making the dough lose its elasticity and become flat.
Over-proofing can happen when the dough is left to rise for too long or in a warm environment.
Therefore, it is essential to monitor the dough’s rising time and avoid over-proofing, which can be done by following the recipe’s instructions or checking the dough’s texture and volume periodically during the rising process.
A well-risen dough with the right amount of elasticity will produce a desirable final product with a good texture and structure.
How Do I Make My Dough More Stretchy?
Fortunately, there are some simple troubleshooting techniques you can use to address non-stretchy dough.
1. Adjust Hydration Levels
One of the key factors to consider is the hydration level of your dough. This basically means the amount of water you add to your flour.
It might not seem like a big deal, but it can make all the difference in achieving that perfect stretchy consistency that we all love.
If your dough is too dry, it won’t have enough moisture to stretch properly without tearing or cracking. But if you add too much water, your dough can become too sticky and difficult to handle. It’s all about finding the right balance.
To increase the hydration level, you can add water, milk, or oil. However, it’s important to do this gradually, as even a small change can make a big difference to the dough’s consistency.
Different types of dough also require different hydration levels to achieve the desired texture. For example, pizza dough typically needs a hydration level of 60-65%, while bread dough may require 70-75%.
It’s also worth remembering that factors like temperature and humidity can affect the dough’s hydration level, so you might need to make adjustments as you go.
Don’t worry too much though, with a little practice and patience, you’ll soon be making perfect dough every time!
2. Fermentation Time
When it comes to making delicious bread or baked goods, there’s a crucial factor that you shouldn’t overlook: fermentation time.
You see, fermentation is the magical process where yeast or other microorganisms in the dough feast on sugars and produce carbon dioxide gas, making the dough rise and expand.

Giving your dough enough time to ferment has a lot of benefits. One of the most noticeable benefits is achieving a more stretchy and elastic consistency.
This is because gluten strands in the flour become more developed as the dough ferments.
The longer the fermentation time, the more the gluten strands develop, making the dough easier to shape and giving it a nice texture.
Moreover, a longer fermentation time also means more complex flavors. As the yeast takes its time breaking down the sugars, it produces byproducts that give your bread a unique, flavorful profile.
It’s important to keep in mind that over-fermenting the dough can have negative consequences. The dough may become too acidic, resulting in a sour taste and a dense texture.
So, it’s best to experiment with different fermentation times and adjust them accordingly to achieve the desired texture and flavor for your baked goods. Don’t be afraid to get creative and try new things until you get it just right.
3. Temperature
Maintaining the appropriate temperature for the dough is crucial for its successful fermentation and gluten development. The dough’s ideal temperature range is between 70-80°F (21-27°C).
If the temperature is too high, above 80°F (27°C), the dough will ferment too quickly, and the yeast will produce too much gas.
As a result, the dough will rise too fast, and the gluten strands may not have enough time to develop fully. This can lead to a loaf with a coarse and dense texture.
On the other hand, if the temperature is too low, below 70°F (21°C), the dough will ferment slowly, and the gluten strands may not have enough time to form properly. This can lead to dense and heavy bread with poor rise and texture.
It’s crucial to maintain a consistent temperature throughout the fermentation process. To achieve this, you can use a thermometer to check the temperature regularly and adjust it as needed.
You can also place the dough in a warm or cool spot, depending on the temperature, to help regulate its fermentation.
3 Tips for Achieving Stretchy Dough
In addition to the troubleshooting tips above, there are some additional techniques you can use to achieve a stretchy dough.
- Use High-Gluten Flour: One of the easiest ways to achieve a stretchy dough is to use high-gluten flour. High-gluten flour has a higher protein content, which means it produces more gluten when mixed with water. Gluten is the protein in flour that creates the elastic structure of the dough. When there is more gluten, the dough is stronger and more elastic, making it easier to stretch and shape.
- Incorporate a Starter or Pre-Ferment: Another technique to improve gluten development and achieve a stretchy dough is to incorporate a starter or pre-ferment. A starter is a mixture of flour and water that has been fermented with wild yeast and bacteria. Adding a small amount of starter or pre-ferment to the dough can improve the flavor and texture of the bread by helping to break down the gluten and making it more elastic.
- Use the Autolyse Method: The autolyse method is another great way to achieve a stretchy dough. This involves combining the flour and water and letting it sit for 30 minutes before kneading. During this time, the flour absorbs the water, which helps to activate the gluten-forming proteins. When the dough is kneaded after the autolyse period, the gluten is already partially developed, resulting in a more elastic dough.
Why Is My Bread Dough Not Stretchy – Conclusion
To sum up, creating perfect dough is a delicate balance of science and art. The type of flour, hydration levels, mixing technique, and rising time all play a crucial role in achieving the desired texture.
Whether you are an experienced baker or just starting, troubleshooting your non-stretchy dough is all part of the fun.
Remember, don’t be discouraged if your first attempts aren’t perfect, practice makes perfect. So, grab your apron, roll up your sleeves, and let’s get baking.
Just make sure to measure your water carefully, or you might end up with a sticky, gooey mess that even your pet won’t want.
